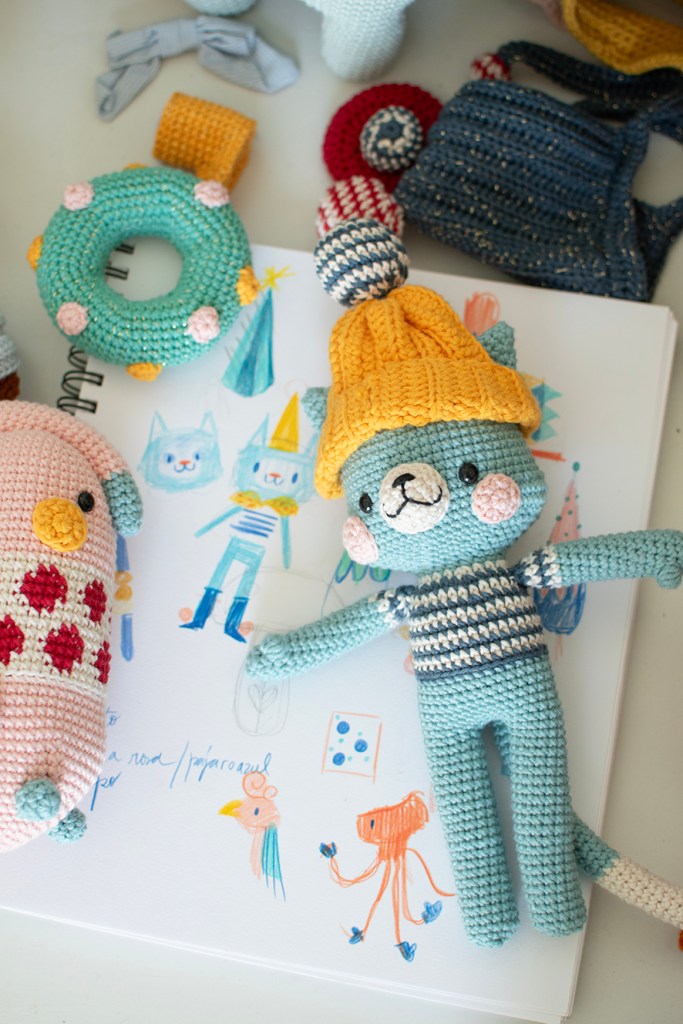
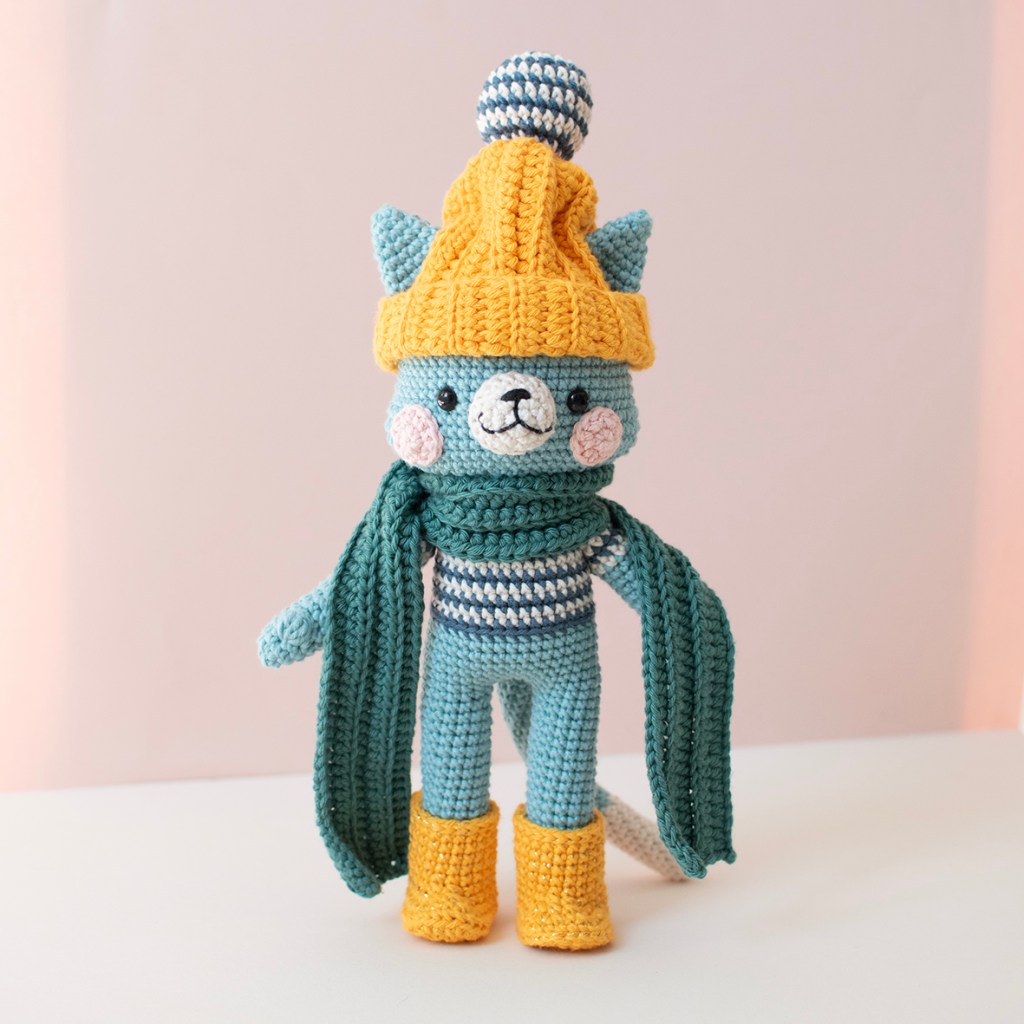
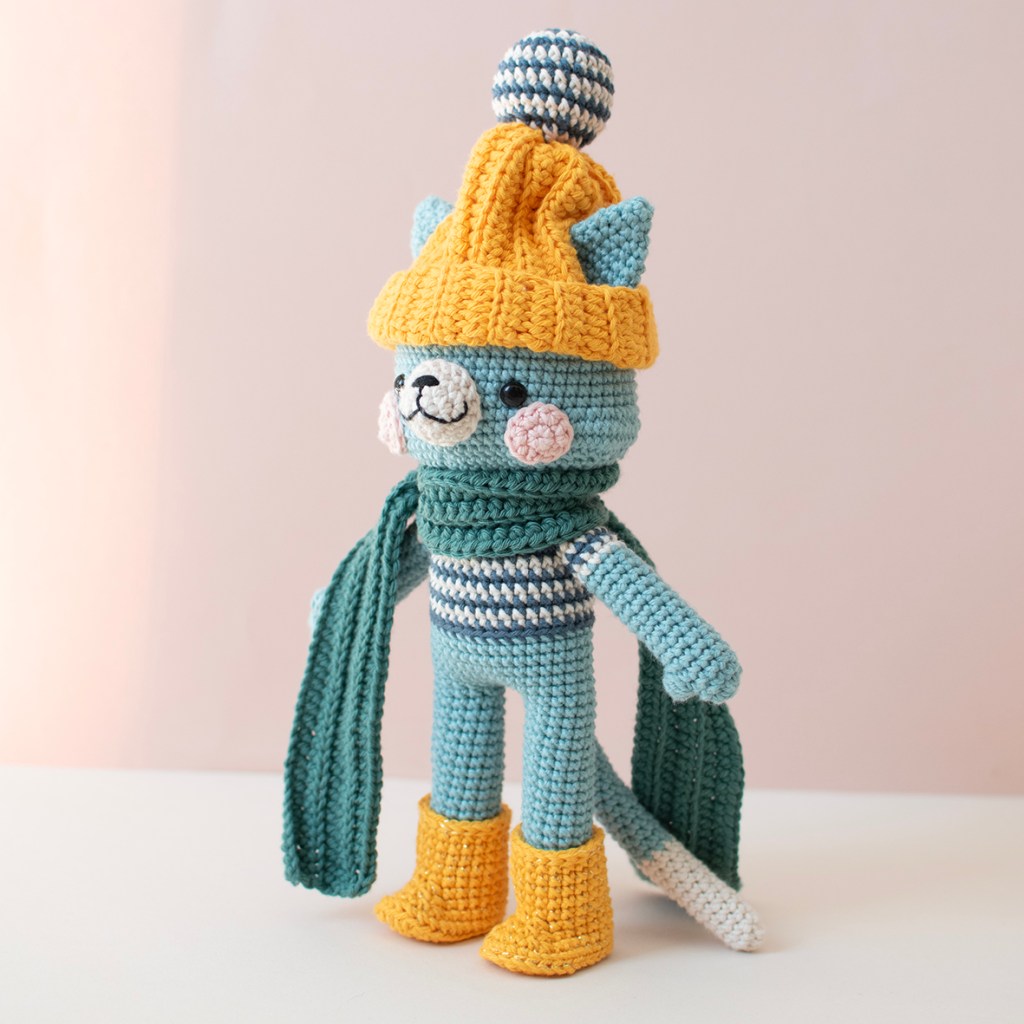
Diseñé a Lenny Gato para la primera colaboración que hice con la marca Hobbii de Dinamarca en 2023. Su nombre es Lenny porque, como muchas descubrieron en su momento, su bufanda extra large esta inspirada en una imagen de Lenny Kravitz, el músico, usando una bufanda que parecía haber sido robada de un gigante. Eso. Sin más preámbulos, a continuación les dejo su patrón.
I designed Lenny Cat for my first collaboration with Danish brand Hobbii in 2023. His name is Lenny because, as many discovered at the time, his extra-large scarf was inspired by an image of Lenny Kravitz, the musician, wearing a scarf that looked like it had been stolen from a giant. And that's it.Without further ado, here's his pattern.
MATERIALS
You may crochet Lenny with any kind of thread you like with the appropriate crochet hook . In this case, for the original character that I made for my first Hobbii collection, I used their Friends Cotton yarn line and a 2.75 crochet hook.
My suggestion:
Cotton 8/7 by Pica Pau for Hobbii Yarns in:
- 1 skein of Pastel Mint (#30) or Pale Blue (#31)
- 1 skein Golden Yellow (#23),  Dandelion (#24) or Honey (#22)
- 1 skein of Pale Pink (#10)
- 1 skein of Dark Blue (#34)
- 1 skein of Green (#26) or Teal Green (#28)
Leftover of Black (#37)
And  Nude Cotton 8/7 by Pica Pau for Hobbii Yarns in:
- 1 skein of Coconut Milk (#01)
Crochet hook 2.75 mm / US C2
2 safety eyes 8 mm
Stuffing
Tapestry needle

ABBREVIATIONS
mr = magic ring
st = stitch
Rnd = round
slst = slip stitch
BLO = back loop only
FLO = front loop only
ch = chain
sc = single crochet
hdc = half double crochet
dec = decrease (2 sts together)
inc = increase (2 sts in the same st)
5-dc-bobble = 5 double crochet bobble stitch

MEASUREMENTS
Height: Approx. 25 cm / 9.8”

Before starting:
Lenny Cat is an intermediate project, worked in a continuous spiral. To keep track of the rounds you may use a stitch marker or safety pin to mark the beginning of a round.
The head, body and legs are worked in a single piece. Lenny Cat also has 3 accessories: a hat, a scarf and a pair of boots.
Remember that it’s always advisable to give the entire pattern a read before starting crocheting and, most importantly, be patient with yourself!

THE PATTERN

CHEEKS
(make 2 in pale pink)
Rnd 1: 6 sc in mr [6]
Rnd 2: inc in all 6 st [12]
Fasten off, leaving a long tail for sewing.

SNOUT
(in coconut milk)
Rnd 1: 6 sc in mr [6]
Rnd 2: inc in all 6 st [12]
Rnd 3: (sc in next st, inc in next st) repeat 6 times [18]
Rnd 4: sc in all 18 st [18]
Embroider the nose and the mouth with black. Stuff lightly.
Fasten off, leaving a long tail for sewing.

HEAD AND BODY
(start in Pastel Mint)
Rnd 1: 6 sc in mr [6]
Rnd 2: inc in all 6 st [12]
Rnd 3: (sc in next st, inc in next st) repeat 6 times [18]
Rnd 4: (sc in next 2 st, inc in next st) repeat 6 times [24]
Rnd 5: (sc in next 3 st, inc in next st) repeat 6 times [30]
Rnd 6: (sc in next 4 st, inc in next st) repeat 6 times [36]
Rnd 7: (sc in next 5 st, inc in next st) repeat 6 times [42]
Rnd 8: (sc in next 6 st, inc in next st) repeat 6 times [48]
Rnd 9: (sc in next 7 st, inc in next st) repeat 6 times [54]
Rnd 10-17: sc in all 54 st [54]
Rnd 18: sc in next 10 st, inc in next 7 st, sc in next 20 st, inc in next 7 st, sc in next 10 st [68]
Rnd 19-20: sc in all 68 st [68]
Rnd 21: sc in next 10 st, dec 7 times, sc in next 20 st, dec 7 times, sc in next 10 st [54]
Rnd 22: (sc in next 7 st, dec) repeat 6 times [48]
Rnd 23: (sc in next 2 st, dec) repeat 12 times [36]
Rnd 24: (sc in next 4 st, dec) repeat 12 times [30]
Sew the snout between rounds 15 and 20. The snout must be placed on the opposite side of the start of the round. Stuff the snout with fiberfill before closing the seam. Insert the safety eyes between rounds 16 and 17, about 3 stitches away from the snout. Sew the cheeks behind the safety eyes.
Rnd 25: (sc in next 3 st, dec) repeat 6 times [24]
Rnd 26: (sc in next 2 st, dec) repeat 6 times [18]
Rnd 27: sc in all 18 st [18]
Stuff the head firmly with fiberfill. Change to coconut milk and continue working  in a stripe pattern, alternating one round in coconut milk and one round in dark blue.
Rnd 28: (sc in next 2 st, inc in next st) repeat 6 times [24]
Rnd 29: (sc in next 3 st, inc in next st) repeat 6 times [30]
Rnd 30: sc in all 30 st [30]
Rnd 31: (sc in next 4 st, inc in next st) repeat 6 times [36]
Rnd 32-37: sc in all 36 st [36]
Change to pastel mint.
Rnd 38: BLO sc in all 36 st [36]
Rnd 39-44: sc in all 36 st [36]
Do not cut the yarn.

THE LEGS
To make the legs, divide the work identifying 4 stitches for the front central space between the legs, 4 stitches for the back and 14 stitches for each leg (you may find it useful to use stitch markers). If the legs don’t line up nicely with the head, crochet a few more sc on the body or undo them. Join the last stitch for the leg on the back side to the front side, working a single crochet stitch (this sc will be the first stitch of the leg). Now the stitches of the first leg are joined in the round. Continue working the first leg:
Rnd 45 – 66: sc in all 14 st [14]
Stuff the body and leg firmly.
Rnd 67: dec 7 times [7]
Fasten off, leaving a long tail. Using a tapestry needle, weave the yarn tail through the front loop of each remaining stitch and pull tight to close. Weave in the yarn end.

Second leg
Rejoin the pastel mint in the fifth unworked stitch at the back of round 44. This is where we start the first stitch of the second leg. Leave a long starting yarn tail.
Rnd 45: sc in all 14 st. When you reach the 14th stitch of the leg, sc in first st to join the round.
Rnd 46 – 67: repeat the pattern for the first leg. Add more stuffing if needed. Using a tapestry needle, sew the 4 stitches between the legs closed.

EARS
(make 2 in pastel mint)
Rnd 1: 5 sc in mr [5]
Rnd 2: sc in all 5 [5]
Rnd 3: inc in all 5 st [10]
Rnd 4: sc in all 10 st [10]
Rnd 5: (sc in next st, inc in next st) repeat 5 times [15]
Rnd 6: sc in all 15 st [15]
Rnd 7: (sc in next st, inc in next st) repeat 5 times [20]
Rnd 8: sc in all 20 st [20]
Fasten off, leaving a long tail for sewing. Do not stuff. Flatten and sew the ears to the head, between rounds 2 and 11.

ARMS
(make 2, start in pastel mint)
Rnd 1: 5 sc in mr [5]
Rnd 2: inc in all 5 st [10]
Rnd 3-4: sc in all 10 st [10]
Rnd 5: sc in next st, 5-dc-bobble in next st, sc in next 8 st [10]
Rnd 6-16: sc in all 10 st [10]
Change to coconut milk and continue working  in a stripe pattern, alternating one round in coconut milk and one round in dark blue.
Rnd 17-19: sc in all 10 st [10]
Rnd 20: (sc in next 3 st, dec) repeat 2 times [8]
Fasten off, leaving a long tail for sewing. Stuff with fiberfill. Sew the arms to both sides, between rounds 29 and 30.

TAIL
(start with coconut milk)
Rnd 1: 8 sc in mr [8]
Rnd 2-12: sc in all 8 st [8]
Change to pastel mint. Stuff lightly and continue stuffing as you go.
Rnd 13-32: sc in all 8 st [8]
Fasten off, leaving a long tail for sewing. Add more stuffing if needed. Sew the tail to the back, centred between rounds 41 and 42.

BOOTS
(make 2, in golden yellow)
Ch 8. Stitches are worked around both sides of the foundation chain.
Rnd 1: start in second ch from the hook, inc in this st, sc in next 5 st, 4 sc in last st. Continue on the other side of the foundation chain,sc in next 5 st, inc in last st [18]
Rnd 2: inc in next 2 st, sc in next 5 st, inc in next 4 st, sc in next 5 st, inc in last 2 st [26]
Rnd 3: inc in next 2 st, sc in next 10 st, inc in next st, sc in next st, inc in next st, sc in next 10 st, inc in last st [31]
Rnd 4: BLO sc in all 31 st [31]
Rnd 5: sc in next 11 st, dec 2 times, sc in next st, dec 2 times, sc in next 11 st [27]
Rnd 6: sc in next 10 st, dec 5 times, sc in next 7 st [22]
Rnd 7: sc in next 10 st, dec 2 times, sc in next 8 st [20]
Rnd 8-12: sc in all 20 st [20]
Rnd 13: slst in all 20 st [20]
Fasten off, weave in the yarn end. Join golden yellow in the last front loop stitch of round 4 and FLO slst in all 31 st. Fasten off, weave in the yarn end.

HAT
(in golden yellow)
Ch 27. Crochet in rows
Row 1: start in third ch from the hook, hdc in next 26 st, ch 2, turn [26]
Row 2-6: BLO hdc in all 26 st, ch 2, turn [26]
Row 7: hdc in next 10 st, ch 6, skip 6 st, hdc in next 10 st, ch 2, turn [26]
Row 8-19: BLO hdc in all 26 st, ch 2, turn [26]
Row 20: hdc in next 10 st, ch 6, skip 6 st, hdc in next 10 st, ch 2, turn [26]
Row 21-27: BLO hdc in all 26 st, ch 2, turn [26]
Fasten off, leaving a long tail for sewing. You will end with a crochet rectangle. Line up row 1 and 27 and, using a tapestry needle, sew both sides together to form a tube. Do not fasten off. Using the same yarn tail, sew through each row-end at the top of the tube. Pull the yarn tail so the round tightens and weave in the ends by sewing back and forth to close the hat opening. Flip the hat inside out.

POMPON
(start with coconut milk)
Rnd 1: 6 sc in mr [6]
Change to dark blue.
Rnd 2: inc in all 6 st [12]
Continue in a stripe pattern, changing color every round, alternating coconut milk and dark blue.
Rnd 3: (sc in next st, inc in next st) repeat 6 times [18]
Rnd 4: (sc in next 2 st, inc in next st) repeat 6 times [24]
Rnd 5-9: sc in all 24 st [24]
Rnd 10: (sc in next 2 st, dec) repeat 6 times [18]
Rnd 11: (sc in next  st, dec) repeat 6 times [12]
Stuff lightly.
Rnd 12: dec 6 times [6]
Fasten off, leaving a long tail for sewing. Sew the pompon to the top of the hat.

SCARF
(in green)
Ch 122. Crochet in rows
Row 1: start in third ch from the hook, hdc in next 120 st, ch 2, turn [120]
Row 2-5: BLO hdc in all 120 st, ch 2, turn [120]
Fasten off and weave in the yarn ends.


Enjoy!
Yan Schenkel
Nivel: Intermedio
Altura: 25 cm / 9.8” aproximadamente
Materiales: Puedes tejer a Lenny Gato con el hilado que prefieras y la aguja de crochet adecuada a ese hilado. En este caso, para el personaje original que diseñé para mi primera colección de Hobbii, usé la línea de lanas Friends Cotton y una aguja de crochet de 2,75. Mi sugerencia: Cotton 8/7 de Pica Pau para Hobbii en: - 1 ovillo de Pastel Mint (#30) or Pale Blue (#31) - 1 ovillo de Golden Yellow (#23), Dandelion (#24) or Honey (#22) - 1 ovillo de Pale Pink (#10) - 1 ovillo de Dark Blue (#34) - 1 ovillo de Green (#26) or Teal Green (#28) Sobrante de Black (#37) Y Nude Cotton 8/7 by Pica Pau para Hobbii en: - 1 ovillo de Coconut Milk (#01) Aguja de crochet de 2.75 mm / US C2 2 ojos de seguridad de 8 mm Relleno (vellón siliconado o de lana) Aguja de tapicería.
ABREVIATURAS p = punto v = vuelta pd= punto deslizado cad = cadena mp = medio punto (punto bajo) mpv = medio punto vareta (medio punto alto) dism = disminución (2 puntos juntos) aum = aumento (2 puntos en el mismo punto) p mota = punto mota/piña (5 puntos vareta/altos cerrados juntos en el mismo punto)
Antes de empezar: Lenny Cat es un proyecto intermedio, que se trabaja en espiral continuo, sin unir vueltas. Para saber dónde están ubicados, recomiendo el uso de marcadores de puntos. Muevan el marcador de puntos al comienzo de cada vuelta. La cabeza, el cuerpo y las piernas se tejen en una sola pieza. Lenny Cat también incluye tres accesorios: un gorro, una bufanda y un par de botas. Recuerda que siempre es recomendable leer el patrón completo antes de empezar a tejer y, sobre todo, ¡tener paciencia!
EL PATRÓN
MEJILLAS (hacer 2 en “pale pink”) 1v: Tejan un anillo de 6 mp [6] 2v: 1 aum en cada uno de los 6 mp [12] Corten dejando una hebra larga para coser.
HOCICO (en “coconut milk) 1v: Tejan un anillo de 6 mp [6] 2v: 1 aum en cada uno de los 6 mp [12] 3v: (1 mp, 1 aum) repitan 6 veces [18]. 4v: 1 mp en cada uno de los 18 mp [18] Corten dejando una hebra larga para coser. Con negro, borden la nariz y la boca.
CABEZA Y CUERPO (comiencen con “pastel mint”) 1v: Tejan un anillo de 6 mp [6]. 2v: 1 aum en cada uno de los 6 mp [12]. 3v: (1 mp, 1 aum) repitan 6 veces [18]. 4v: (2 mp, 1 aum) repitan 6 veces [24]. 5v: (3 mp, 1 aum) repitan 6 veces [30]. 6v: (4 mp, 1 aum) repitan 6 veces [36]. 7v: (5 mp, 1 aum) repitan 6 veces [42]. 8v: (6 mp, 1 aum) repitan 6 veces [48]. 9v: (7 mp, 1 aum) repitan 6 veces [54]. 10v-17v: 1 mp en cada uno de los 54 mp [54]. 18v: 10 mp, 7 aum, 20 mp, 7 aum, 10 mp [68] 19v-20v: 1 mp en cada uno de los 68 mp [68] 21v: 10 mp, 7 dism 20, 7 dism, 10 mp [54] 22v: (7 mp, 1 dism) repitan 6 veces [48] 23v: (2 mp, 1 dism) repitan 12 veces [36] 24v: (4 mp, 1 dism) repitan 12 veces [30] Cosan el hocico entre las vueltas 15 y 20 del lado opuesto del inicio de las vueltas. Rellenen el hocico antes de terminar de coserlo. Coloquen los ojos de seguridad entre las vueltas 16 y 17, a 3 mp de distancia del hocico. Cosan las mejillas debajo de los ojos. 25v: (3 mp, 1 dism) repitan 6 veces [24]. 26v: (2 mp, 1 dism) repitan 6 veces [18]. 27v: 1 mp en cada uno de los 18 mp [18]. Rellenen la cabeza. Continúen con un patrón a rayas alternando “coconut milk” y “dark blue”. 28v: (2 mp, 1 aum) repitan 6 veces [24]. 29v: (3 mp, 1 aum) repitan 6 veces [30]. 30v: 1 mp en cada uno de los 30 mp [30]. 31v: (4 mp, 1 aum) repitan 6 veces [36]. 32v-37v: 1 mp en cada uno de los 36 mp [36]. Cambien a “pastel mint”. 38v: Tejan tomando solo la hebra trasera, 1 mp en cada uno de los 36 mp [36] 39v-44v: 1 mp en cada uno de los 36 mp [36]. No corten la hebra.
PATAS Dividan el tejido marcando 4 puntos para el espacio central delantero entre las patas, 4 puntos para el espacio trasero y 14 puntos para cada extremidad (acá es muy útil el marcador de puntos). Si las patas no quedaran bien alineadas con la cabeza, tejan o destejan algunos mp para llegar a la posición deseada. Unan con 1 mp el último punto para la pata en la parte trasera con el primer punto en la parte delantera (este punto contará como el primer mp de la primera vuelta). Así, los puntos para la primera pata estarán unidos para seguir tejiendo en vueltas. Continúen tejiendo: 45v-66v: 1 mp en cada uno de los 14 mp [14]. Rellenen el torso y la primera pata. 67v: 7 dism [7] Corten dejando una hebra larga para cerrar los últimos 7 puntos. Con la aguja de tapicería, pasen por el medio de cada punto y ajusten hasta cerrar el agujero. Rematen.
Segunda pata Con “pastel mint” retomen en el quinto punto sin tejer de la espalda en la vuelta 44 dejando una hebra de inicio larga para luego cerrar la entrepierna. Desde este punto comiencen a tejer la segunda pata. 45v: 1 mp en cada uno de los 14 mp. Al llegar al punto 14, unan con 1 mp al primer punto de la vuelta (el que se hizo al retomar el tejido) [14]. 46v-67v: Repitan el patrón de la primera pata. Terminen de rellenar el cuerpo y la segunda pata. Con una aguja de tapicería, cierren la separación entre las patas cosiendo los 4 puntos centrales con la hebra larga que dejaron al retomar el tejido.
OREJAS (hagan 2 en “pastel mint”) 1v: Tejan un anillo de 5 mp [5] 2v: 1 mp en cada uno de lso 5 mp [5] 3v: 1 aum en cada uno de los 5 mp [10]. 4v: 1 mp en cada uno de los 10 mp [10] 5v: (1 mp, 1 aum) repitan 5 veces [15]. 6v: 1 mp en cada uno de los 15 mp [15] 7v: (2 mp, 1 aum) repitan 5 veces [20]. 8v: 1 mp en cada uno de los 20 mp [20] Corten dejando una hebra larga para coser. No las rellenen. Aplanen y cosan las orejas entre las vueltas 2 y 11 de la cabeza.
BRAZOS (hagan 2 en “pastel mint”) 1v: Tejan un anillo de 5 mp [5]. 2v: 1 aum en cada uno de los 5 mp [10]. 3v-4v: 1 mp en cada uno de los 10 mp [10] 5v: 1 mp, 1 p mota, 8 mp [10]. 6v-16v: 1 mp en cada uno de los 10 mp [10] Continúen con un patrón a rayas alternando “coconut milk” y “dark blue”. 17v-19v: 1 mp en cada uno de los 10 mp [10] 20v: (3 mp, 1 dism) repitan 2 veces [8]. Corten dejando una hebra larga para coser. Rellenen. Cosan los brazos entre las vueltas 29 y 30.
COLA (comiencen con “coconut milk”) 1v: Tejan un anillo de 8 mp [8]. 2v-12 v: 1 mp en cada uno de los. 8 mp [8]. Cambien a “pastel mint”. Rellenen un poquito y continúen rellenando mientras tejen. 13v-32 v: 1 mp en cada uno de los. 8 mp [8]. Corten dejando una hebra larga para coser. Rellenen más de ser necesario. Cosan la cola en el medio de la espalda, centrada entre las vueltas 41 y 42.
BOTAS (hagan 2, en “golden yellow”) Tejan 8 cad. Tejan en ambos lados de la cadena base. 1v: Comiencen en el segundo p cad desde la aguja,1 aum, 5 mp, 4 mp en último p cad. Continúen sobre el otro lado de la cadena base, 5 mp, 1 aum [18]. 2v: 2 aum, 5 mp, 4 aum, 5 mp, 1 aum [26]. 3v: 2 aum, 10 mp, 1 aum, 1 mp, 1 aum, 10 mp, 1 aum [31] 4v: Tejan tomando solo la hebra trasera, 31 mp [31]. 5v: 11 mp, 2 dism,1 mp, 2 dism, 11 mp [27]. 6v: 10 mp, 5 dism, 10 mp [22]. 7v: 10 mp, 2 dism, 8 mp [20]. 8v-12v: 1 mp en cada uno de los 20 mp [20]. 13v: 1 pd en cada uno de los 20 mp [20]. Corten la hebra y rematen. Con color “golden yellow”, retomen en el primer punto delantero de la vuelta 4 y tejan solo tomando la hebra delantera, 31 p deslizado. Corten la hebra y rematen.
SOMBRERO (en “golden yellow”) Tejan 27 cad. Tejan en hileras, ida y vuelta. 1h: Comiencen en el segundo p cad desde la aguja, 26 pmv, 2 cad y giren [26]. 2h-6h: Tejan tomando solo la hebra trasera 26 pmv, 2 cad y giren [26]. 7h: Tejan tomando solo la hebra trasera, 10 pmv, 6 cad, salten 6 p, 10 pmv, 2 cad y giren [26] 8h-19h: Tejan tomando solo la hebra trasera 26 pmv, 2 cad y giren [26]. 20h: Tejan tomando solo la hebra trasera, 10 pmv, 6 cad, salten 6 p, 10 pmv, 2 cad y giren [26] 21h-27h: Tejan tomando solo la hebra trasera 26 pmv, 2 cad y giren [26]. Corten dejando una hebra larga para coser. Obtendrán así un rectángulo de crochet. Con la aguja de tapicería y sosteniendo la hilera 1 y la hilera 27 juntas, cosan ambos extremos para así formar un tubo. No corten la hebra. Con la misma hebra, cosan por el medio de cada final de hilera en la parte superior del tubo. Ajusten y terminen de cerrar el agujero cosiendo de un lado hacia el otro. Den vuelta el sombrero de adentro hacia fuera.
POMPÓN (comiencen con “coconut milk”) 1v: Tejan un anillo de 6 mp [6]. Cambien a “dark blue” 2v: 1 aum en cada uno de los 6 mp [12]. Continúen con un patrón a rayas alternando “coconut milk” y “dark blue”. 3v: (1 mp, 1 aum) repitan 6 veces [18]. 4v: (2 mp, 1 aum) repitan 6 veces [24]. 5v-9v: 1 mp en cada uno de los 24 mp [24]. 10v: (2 mp, 1 dism) repitan 6 veces [18]. 11v: (1 mp, 1 dism) repitan 6 veces [12]. Rellenen un poquito. 12v: 6 dism [6]. Corten dejando una hebra larga para coser. Cosan el pompón en la punta del sombrero.
BUFANDA (con “green”) Tejan 122 cad. Tejan en hileras, ida y vuelta. 1h: Comiencen en el tercer p cad desde la aguja, 120 pmv, 2 cad y giren [120]. 2h-5h: Tejan tomando solo la hebra trasera, 120 pmv, 2 cad y giren [120]. Corten la hebra y rematen.


Leave a comment