
(The English version is below)
Juan Osito es un personaje que nació en enero del 2023 como excusa para poder armar unos videos que pudieran facilitar el acceso a la forma de como pienso y tejo mis personajes tejidos.
Definitivamente no es mejor que otras (espero que tampoco sea peor), pero es la manera en la que me sale.
Quienes ya conocen mi trabajo, saben que aprendí de forma autodidacta (no existían las redes sociales ni millón de videos tutoriales) lo cual implica que tengo muchas formas de hacer las cosas que no necesariamente sean muy prácticas. Tampoco me preocupa "la perfección": cuestiones como el escaloncito que se forma cuando se hacen cambios de color, o que una pata que 2 milímetros más larga que la otra me tienen sin cuidado.
Tal vez sea una excusa que mi cabeza trabajó hace años para permitirme seguir tejiendo sin estancarme ahí, pero lo que me pasa con esos detalles es que en vez de verlos como errores a ser solucionados, para mí son signos del tejido a mano, características del tejido al crochet, algo así como apreciar los ensambles de un mueble de madera, o las huellas dactilares en una pieza de cerámica.
Lógicamente, son gustos personales. Si no pueden dormir pensando en esos detalles y necesitan solucionarlos, o al menos maquillarlos un poco, hay miles de videos y tutoriales explicando cómo hacerlo. Sólo quería explicarles que no seré yo quien haga esos videos porque les estaría mintiendo, o tratando de explicar algo que realmente no uso y no tengo la suficiente experiencia como para atreverme a enseñarles.
Juan Osito es un patrón relativamente sencillo, pero que, al mismo tiempo, abarca una cantidad interesante de técnicas que creo pueden ser herramientas útiles para despejar dudas y así puedan embarcarse con más confianza a la hora de tejer mis diseños.
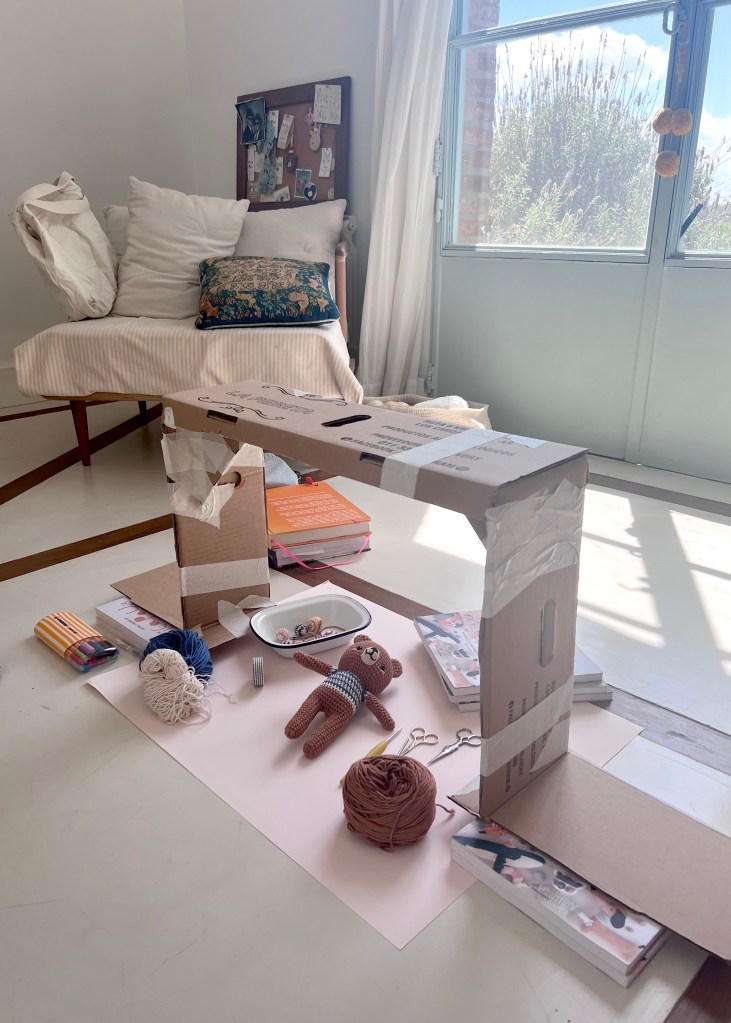
Pueden leer el post original en mi viejo blogspot aquí. Y ver las fotos de cómo lo filmé usando de sostén una caja de verduras, jajaja (después pude comprarme un trípode, pero mis videos siguen siendo igual de malos)
Y, por favor, siempre recuerden que:
EL PATRÓN ES GRATUITO, PERO TIENE AUTORA (QUIEN SUSCRIBE), POR LO CUAL LOS DERECHOS DE AUTOR SOBRE EL MISMO SON EXACTAMENTE LOS MISMOS QUE CON LOS PATRONES DE PAGO.
Muchas gracias!!!
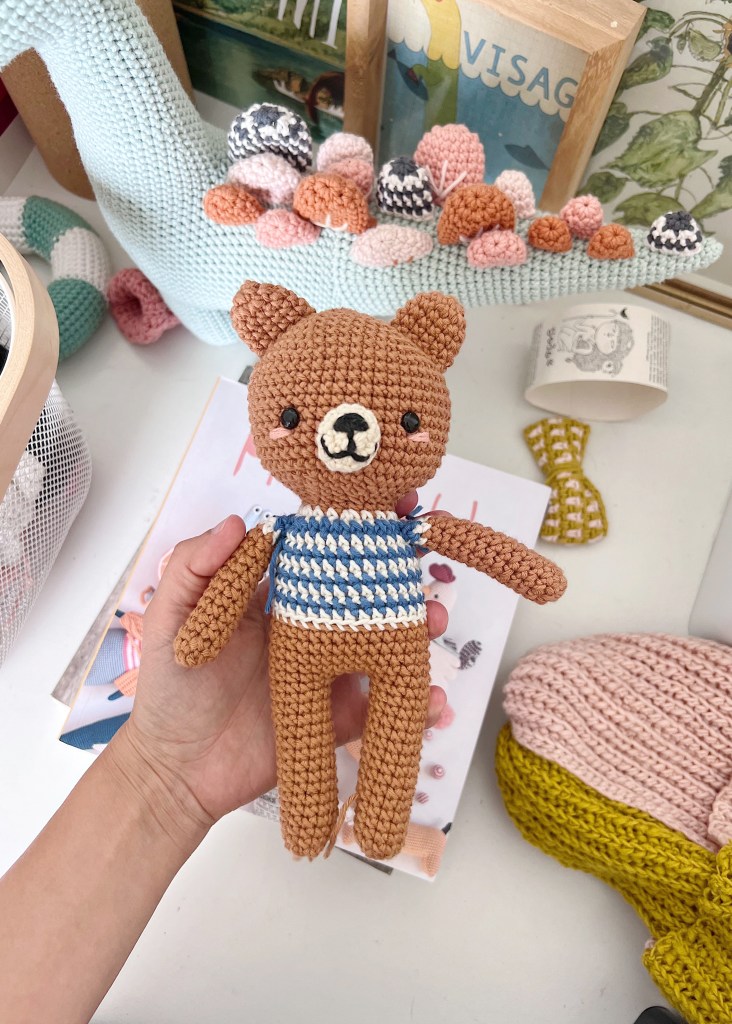
JUAN OSITO PARDO
Nivel: Principiante
Altura: 20 cm (orejas incluidas)
Materiales: Puedes tejer a Juan Osito con el hilado que prefieras y la aguja de crochet adecuada para ese hilado. En este caso, para el personaje original que diseñé para el curso de Youtube utilicé hilados Cotoné (hilandería TSM) y una aguja de crochet de 2,75.
Mi sugerencia:
Nude Cotton 8/7 by Pica Pau para Hobbii en:
- 1 ovillo de Caramel (#24)
-1 ovillo de Buttermilk (#03)
Y Cotton 8/7 de Pica Pau para Hobbii en:
- 1 ovillo French Blue (#33)
-1 ovillo Porcelain (#01)
- Sobrante de Dusty Pink (#08)
- Sobrante de Black (#37)
Aguja de crochet de 2.75 mm / US C2
2 ojos de seguridad de 8 mm
Relleno (vellón siliconado o de lana)
Aguja de tapicería.
ABREVIATURAS
p = punto
v = vuelta
pd= punto deslizado
cad = cadena
mp = medio punto (punto bajo)
dism = disminución (2 puntos juntos)
aum = aumento (2 puntos en el mismo punto)
Antes de empezar:
Juan Osito es un proyecto para principiantes, que se trabaja en espiral continuo, sin unir vueltas. Para saber dónde están ubicados, recomiendo el uso de marcadores de puntos. Muevan el marcador de puntos al comienzo de cada vuelta.
La cabeza, el cuerpo y las piernas se tejen en una sola pieza.
Recuerda que siempre es recomendable leer el patrón completo antes de empezar a tejer y, sobre todo, ¡tener paciencia!
HOCICO
(en "buttermilk")
1v: Tejan un anillo de 6 mp [6].
2v: 1 aum en cada uno de los 6 mp [12].
3v-4v: 1 mp en cada uno de los 12 mp [12].
Corten dejando una hebra larga para coser. Con negro, borden la nariz y la boca.
CABEZA Y CUERPO
(en con "caramel")
1v: Tejan un anillo de 6 mp [6].
2v: 1 aum en cada uno de los 6 mp [12].
3v: (1 mp, 1 aum) repitan 6 veces [18].
4v: (2 mp, 1 aum) repitan 6 veces [24].
5v: (3 mp, 1 aum) repitan 6 veces [30].
6v: (4 mp, 1 aum) repitan 6 veces [36].
7v: (5 mp, 1 aum) repitan 6 veces [42].
8v: (6 mp, 1 aum) repitan 6 veces [48].
9v-18v: 1 mp en cada uno de los 48 mp [48].
19v: (4 mp, 1 dism) repitan 8 veces [40].
20v: (3 mp, 1 dism) repitan 8 veces [32].
Cosan el hocico entre las vueltas 14 y 18, del lado opuesto del inicio de vueltas. Rellenen el hocico antes de terminar de coser. Coloquen los ojos de seguridad entre las vueltas 14 y 15, a 3 mp del hocico. Con "dusty pink", borden los cachetes debajo de los ojos.
21v: (2 mp, 1 dism) repitan 8 veces [24].
22v: (2 mp, 1 dism) repitan 6 veces [18].
23v: 1 mp en cada uno de lso 18 mp [18].
Rellenen la cabeza. Continúen con un patrón a rayas, alternando una vuelta en "porcelain" con una vuelta en color "French blue"
24v: (2 mp, 1 aum) repitan 6 veces [24].
25v: (2 mp, 1 aum) repitan 8 veces [32].
26v-32v: 1 mp en cada uno de los 32 mp [32].
Cambien a "caramel".
33v: Tejan tomando solo la hebra trasera, 1 mp en cada uno de los 32 mp [32].
34v-38v: 1 mp en cada uno de los 32 mp [32].
No corten la hebra.
PATAS
Dividan el tejido marcando 4 puntos para el espacio central delantero entre las patas, 4 puntos para el espacio trasero y 12 puntos para cada extremidad (acá es muy útil el marcador de puntos). Si las patas no quedaran bien alineadas con la cabeza, tejan o destejan algunos mp para llegar a la posición deseada. Unan con 1 mp el último punto para la pata en la parte trasera con el primer punto en la parte delantera (este punto contará como el primer mp de la primera vuelta). Así, los puntos para la primera pata estarán unidos para seguir tejiendo en vueltas. Continúen tejiendo:
39v-53v: 1 mp en cada uno de los 12 mp [12].
Rellenen firmemente el torso y la primera pata
54v: 6 dism [6].
Corten dejando una hebra larga para cerrar los últimos 6 puntos. Con la aguja de tapicería, pasen por el medio de cada punto y ajusten hasta cerrar el agujero. Rematen.
Segunda pata
Con "caramel" , retomen en el quinto punto sin tejer de la espalda en la vuelta 38 dejando una hebra de inicio larga para luego cerrar la entrepierna. Desde este punto comiencen a tejer la segunda pata.
39v: 1 mp en cada uno de los 12 mp. Al llegar al punto 12, unan con 1 mp al primer punto de la vuelta (el que se hizo al retomar el tejido) [12].
40v-54v: Repitan el patrón de la primera pata. Terminen de rellenar el cuerpo y la segunda pata. Con una aguja de tapicería, cierren la separación entre las patas cosiendo los 4 puntos centrales con la hebra larga que dejaron al retomar el tejido.
BRAZOS
(hagan 2, comiencen con "caramel")
1v: Tejan un anillo de 8 mp [8].
2v-13v: 1 mp en cada uno de los 8 mp [8].
Continúen con un patrón a rayas, alternando una vuelta en color "porcelain" con una vuelta en "French blue".
4v-15v: 1 mp en cada uno de los 8 mp [8].
Corten dejando una hebra larga para coser. Rellenen. Cosan los brazos entre las vueltas 25 y 26.
OREJAS
(hagan 2, con "caramel")
1v: Tejan un anillo de 6 mp [6].
2v: 1 aum en cada uno de los 6 mp [12].
3v-5v: 1 mp en cada uno de los 12 mp [12].
Corten dejando una hebra larga para coser. No las rellenen y aplánenlas antes de coserlas en la cabeza, entre las vueltas 4 y 8, aproximadamente.
COLA
(en "caramel")
1v: Tejan un anillo de 6 mp [6].
2v: 1 mp en cada uno de los 6 mp [6].
Corten dejando una hebra larga para coser. Cosan la cola en la espalda, centrada entre las vueltas 32 y 35, aproximadamente.
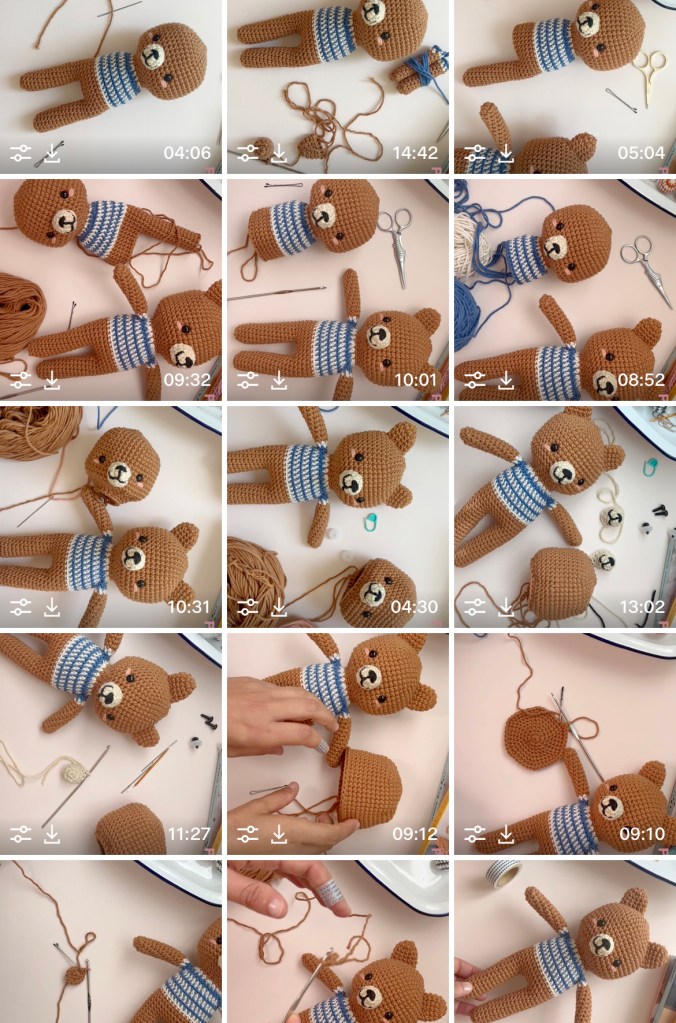
A continuación tienen el primer video de la serie. Pueden ver todos en mi CANAL DE YOUTUBE
Y, por favor, siempre recuerden que:
EL PATRÓN ES GRATUITO, PERO TIENE AUTORA (QUIEN SUSCRIBE), POR LO CUAL LOS DERECHOS DE AUTOR SOBRE EL MISMO SON EXACTAMENTE LOS MISMOS QUE CON LOS PATRONES DE PAGO.


JUAN LITTLE BEAR

Juan Little Bear is a character born in January 2023 as an excuse to put together some videos that would make it easier to understand how I think about and make my crocheted characters.
It's definitely not better than others (I hope it's not worse either), but it's the way I do it.
Those who already know my work know that I learned self-taught (back them there were no social media or millions of tutorial videos ), which means I have many ways of doing things that aren't necessarily very practical. I'm also not worried about "perfection": things like the little gap that forms when changing colors, or the fact that one leg is 2 millimeters longer than the other don't bother me.
Maybe it's an excuse my head worked on years ago to allow me to continue crocheting without getting stuck there, but what happens to me with those details is that instead of seeing them as mistakes to be fixed, for me they're signs of hand-crocheted, characteristics of crochet, something like appreciating the joints of a piece of wooden furniture, or the fingerprints on a piece of pottery.

Obviously, these are personal tastes. If you can't sleep thinking about those details and need to fix them, or at least smooth them over a bit, there are thousands of videos and tutorials explaining how to do it. I just wanted to explain that I won't be the one making those videos because I'd be lying to you, or trying to explain something I don't really use and don't have enough experience to dare to teach you.

Juan Little Bear is a relatively simple pattern, but at the same time, it covers an interesting number of techniques that I think can be useful tools to clear up doubts so you can embark on my designs with more confidence.

You can read the original post on my old blogspot here. And see the photos of how I filmed it using a vegetable box as a prop, hahaha (I was able to buy a tripod later, but my videos are still just as bad).


THE PATTERN

Skill level: Beginner

Size: 7.8 inches / 20 cm tall
when made with the indicated yarn (ears included)

Materials: You may crochet Juan with any kind of thread you like with the appropriate crochet hook. In this case, for the original character that I made for my Youtube amigurumi course, I used Cotoné (a cotton yarn from Argentina) and a 2.75 crochet hook.
My suggestion:
Nude Cotton 8/7 by Pica Pau for Hobbii in:
- 1 skein of Caramel (#24)
-1 skein of Buttermilk (#03)
And Cotton 8/7 de Pica Pau for  Hobbii in:
- 1 skein of French Blue (#33)
-1 skein of Porcelain (#01)
- Leftover of Dusty Pink (#08)
- Leftover of  Black (#37)
Crochet hook 2.75 mm / US C2
2 safety eyes 10 mm
Stuffing
Tapestry needle

ABBREVIATIONS
st = stitch
Rnd = round
slst = slip stitch
BLO = back loop only
ch = chain
sc = single crochet
dec = decrease (2 sts together)
inc = increase (2 sts in the same st)

Before starting:
Juan Little Bear is a beginner project, worked in a continuous spiral. To keep track of the rounds you may use a stitch marker or safety pin to mark the beginning of a round.
The head, body and legs are worked in a single piece.
Remember that it’s always advisable to give the entire pattern a read before starting crocheting and, most importantly, be patient with yourself!

SNOUT
(in buttermilk)
Rnd 1: start 6 sc in a magic ring [6]
Rnd 2: inc in all 6 st [12]
Rnd 3-4: sc in all 12 st [12]
Fasten off, leaving a long tail for sewing. Embroider the nose and mouth with black yarn.

HEAD / BODY
(start in caramel)
Rnd 1: start 6 sc in a magic ring [6]
Rnd 2: inc in all 6 st [12]
Rnd 3: (sc in next st, inc in next st) repeat 6 times [18]
Rnd 4: (sc in next 2 st, inc in next st) repeat 6 times [24]
Rnd 5: (sc in next 3 st, inc in next st) repeat 6 times [30]
Rnd 6: (sc in next 4 st, inc in next st) repeat 6 times [36]
Rnd 7: (sc in next 5 st, inc in next st) repeat 6 times [42]
Rnd 8: (sc in next 6 st, inc in next st) repeat 6 times [48]
Rnd 9-18: sc in all 48 st [48]
Rnd 19: (sc in next 4 st, dec) repeat 8 times [40]
Rnd 20: (sc in next 3 st, dec) repeat 8 times [32]
Sew the snout between rounds 14 and 18. The snout must be placed on the opposite side of the start of the round. Stuff the snout with fiberfill before closing the seam. Insert the safety eyes between rounds 14 and 15, about 3 stitches away from the snout. Embroider the cheeks with dusty pink yarn.
Rnd 21: (sc in next 2 st, dec) repeat 8 times [24]
Rnd 22: (sc in next 2 st, dec) repeat 6 times [18]
Rnd 23: sc in all 18 st [18]
Stuff the head firmly. Continue in a stripe pattern, changing color every round, alternating between porecelain and French Blue.
Rnd 24: (sc in next 2 st, inc in next st) repeat 6 times [24]
Rnd 25: (sc in next 2 st, inc in next st) repeat 8 times [32]
Rnd 26-32: sc in all 32 st [32]
Change to caramel yarn.
Rnd 33: BLO sc in all 32 st [32]
Rnd 34-38: sc in all 32 st [32]
Do not fasten off.

THE LEGS
To make the legs, divide the work identifying 4 stitches for the front central space between the legs, 4 stitches for the back and 12 stitches for each leg (you may find it useful to use stitch markers). If the legs don't line up nicely with the head, crochet a few more sc on the body or undo them. Join the last stitch for the leg on the back side to the front side, working a single crochet stitch (this sc will be the first stitch of the leg). Now the stitches of the first leg are joined in the round. Continue working the first leg:
Rnd 39-53: sc in all 12 st [12]
Stuff the body and leg firmly.
Rnd 54: dec 6 times [6]
Fasten off, leaving a long tail. Using a tapestry needle, weave the yarn tail through the front loop of each remaining stitch and pull tight to close. Weave in the yarn end.

Second leg
Rejoin caramel yarn in the fifth unworked stitch at the back of round 38. This is where we start the first stitch of the second leg. Leave a long starting yarn tail.
Rnd 39: sc in all 12 st. When you reach the 12th st of the leg, sc in first stitch to join the round.
Rnd 40-54: repeat the pattern for the first leg.
Stuff the second leg and add more stuffing to the body if needed. Using a tapestry needle, sew the 4 stitches between the legs closed.

ARMS
(make 2, start in caramel)
Rnd 1: start 8 sc in a magic ring [8]
Rnd 2-13: sc in all 8 st [8]
Continue in a stripe pattern, changing color every round, alternating between porcelain and French blue.
Rnd 14-15: sc in all 8 st [8]
Fasten off, leaving a long tail for sewing. Stuff with fiberfill. Sew the arms to both sides between rounds 25 and 26.

EARS
(make 2, in caramel)
Rnd 1: start 6 sc in a magic ring [6]
Rnd 2: inc in all 6 st [12]
Rnd 3-5: sc in all 12 st [12]
Fasten off leaving a long tail for sewing. Don’t need to stuff. Flatten the ears and sew them om top of the head, between rounds 4 and 8, approx.

TAIL
(in caramel)
Rnd 1: start 6 sc in a magic ring [6]
Rnd 2: sc in all 6 st [6].
Fasten off leaving a long tail for sewing. Do not stuff. Sew the tail to the back, centered over rounds 32 and 35.

And please,  always remember:
THE PATTERN IS FREE, BUT IT HAS AN AUTHOR (THE SUBSCRIBER), SO THE COPYRIGHT IS  EXACTLY THE SAME AS WITH THE PAID PATTERNS.
Thank you so much!!!

Above is the first video in the series. You can watch them all on my YouTube Channel.


Leave a comment